Desktop Shortcut Tricks
Warning: This post will get a bit techie. :)
Today I’d like to talk about some really useful tricks and tricks that you can do using the Guild Wars shortcut on your desktop.

Before I get into the tricks, let’s take a quick look at how and where we’ll be making changes. Right click on the shortcut and then click on “Properties” in the menu that pops up. A box that looks like the following should appear:
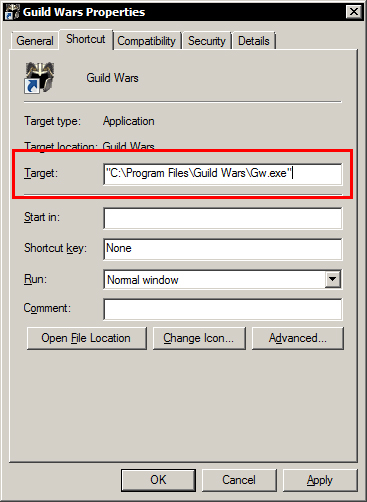
The “Target” box that is outlined in red above is where we’ll be working our magic. The picture shows the default installation path of GW if you did not customize your installation. Now let’s move on to the fun.
High Quality Screenshots
By default, GW takes screenshots as .jpg files but the game can also store pictures as .bmp files. The .bmp files that GW can create are much larger than their .jpg file counterparts but they are also of a much higher quality. To force GW to use .bmp files, edit the “Target” box above by adding ‘-bmp’ to the end. The final target should look like:
"C:Program FilesGuild WarsGw.exe" -bmp
Click Apply and OK, then double click your newly edited shortcut. Once you’re in the game proceed to snap a few screenshots and then go to your screenshots folder to view your now high quality GW screenshots.
Speedy Loading Screens
We’ve all sat in front of loading screens while the game downloaded any new files or game updates. By creating a new shortcut and doing a little editing of that shortcut, you can vastly improve your load times with respect to downloads. The game has an option that will force a complete update of the game. That means every file will be downloaded whether you’ve been to an area or not.
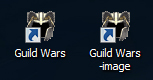
First, create a new shortcut by simply copying the current desktop shortcut and pasting it to your desktop. You should now have 2 shortcuts on your desktop for GW. Rename the copied shortcut to something like “Guild Wars Updater”, “Guild Wars –image”, etc.
Now that you have both of your shortcuts, right click the new shortcut and click on properties in the menu. Remove anything after "C:Program FilesGuild WarsGw.exe" and simply add ‘-image’ to the end. If done correctly, the “Target” should look like:
"C:Program FilesGuild WarsGw.exe" –image
The –image command/option is a very useful command but be aware that on new installations of GW the update that this tool does can take hours so it is advisable to do this update over night whenever possible. Also, note that when using the –image command GW will not open up after the update is complete. This tool is meant to be an update only.
Want to do more?
Other useful command line options include the ability to add your email and password to the shortcut to allow auto-login. Unfortunately, this is VERY unsafe if anyone has access to your computer. The email and password are just plain text and can easily be read (and stolen) by knowledgeable prying eyes.
The following links can be used if you'd like to do more with your desktop shortcuts or for the techies out there, the command line.
Links: